Sproutingfam.com is supported by its readers. If you purchase through a link on my site, I may earn a commission. Learn more
How To Sprout Buckwheat Groats In 5 Steps
Learning how to sprout buckwheat groats came out of necessity for us because I had to stop eating bread. I needed a gluten-free wheat flour alternative, and with “wheat” in its name, buckwheat flour became the first replacement.
I then switched to sprouted buckwheat flour instead for three reasons:
- It’s healthier – Less antinutrients. And more nutrients available when sprouted.
- Tastes better than unsprouted buckwheat flour.
- It’s easy to make! Just grind down fresh from your own dehydrated buckwheat sprouts you’ve got stored up in a sealed container before each use.
These buckwheat sprouting instructions will teach you how to sprout buckwheat groats.
The essential first step for making the flour.
Aside from the benefit of having more glyphosate free food to work with at home.
Learn how to clean, sprout, harvest, store and finally, dehydrate sprouted buckwheat groats so you can mill them down into a glorious, gluten-free flour at home on future recipes.

Why Sprout Buckwheat Groats?
What even are they?
Buckwheat groats are the de-husked seeds of the buckwheat plant (Fagopyrum esculentum). A plant whose history traces back to the east in ancient times.
It’s known as a pseudocereal because its seeds mimic grain. It has a deep taproot system that scoops up untapped nutrients under the earth, loading its grain-like seeds with nutrients.
Most types of sprouts are not mucilaginous. This is where a coat of clear slime covers them when they get wet.
Buckwheat groats are.
But unlike tomato seeds we all know and love (or avoid), buckwheat groats aren’t unsproutable evil gremlins when they get wet.
They’re great jar sprouters!
How To Sprout Buckwheat Groats In A Mason Jar Step-By-Step
Ingredients
- Sproutable Buckwheat Groats: Your safe if the label says “sproutable” like with these.
- Purified Water: For cleaning, soaking, sprouting.
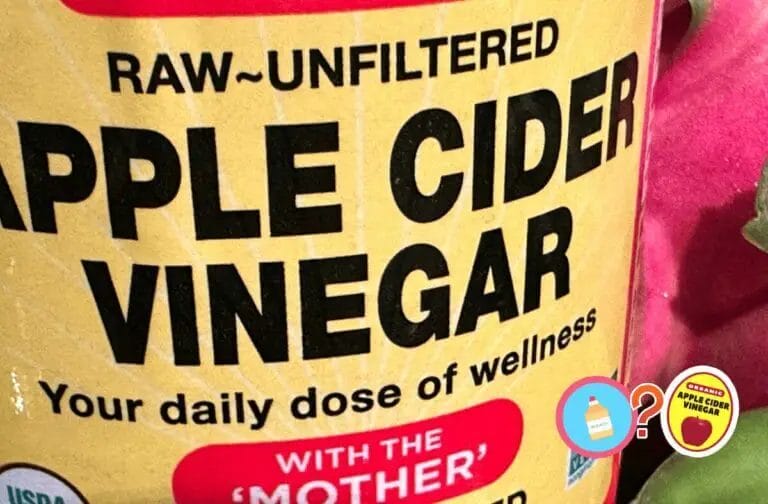
- Apple cider vinegar: For sanitation solution.
- Dish-soap: Groat sanitation solution calls for 1 drop.
Equipment
The parts you’ll need and why you need them below.
- Quart-sized mason jar(s): for rinsing, sanitizing, soaking and sprouting. *This one is a Ball jar, but same thing.
- Sprouting lid: one for each mason jar being used.
- Glass bowl: alternative way to sanitize and soak groats (w/ cheesecloth cover).
- Large, fine mesh strainer: For the rinses prior to the jar sprouting process.
- Organic cheesecloth (muslin cloth): a cover for when sanitizing and soaking. *The one linked is GOTS certified, unbleached, organic cotton.
Note: It’s best to have a sterilized mason jar ready for the post-soak sprouting.
Preparation
Use sanitized sprouting equipment and materials to not potentially taint your groats even before they get to the jar. If your jar or lid have never seen mold, a hot soapy-water clean followed by a vinegar rinse should be sufficient for cleaning them.
If you haven’t got organic or certified pesticide-free buckwheat groats, then make sure you rinse, sanitize best as possible and rinse real good again before getting going.
Instructions
Step 1. Sanitize Buckwheat Groats
The first rinse prior to soaking is for the removal of starch and debris.
Skipping the rinse before sanitizing and soaking will make the groats sit in murky waters that can put sprouting groats at risk.
In a strainer, rinse the groats for a couple minutes using cool, clean water.
Next, choose your preferred cleaning solution:
- Vinegar solution: 1 pt. vinegar to 4 pt. water
- 10% salt water solution: Dissolve salt in water (1 pt. salt to 10 pt. water).
- Baking soda solution: mix 1 teaspoon of baking soda to each 16 ounces (or 2 cups) of water.
We use the vinegar solution plus a drop of dish soap. I’ve heard that it’s advised not to use soap for the groats, but with excessive rinsing afterwards, all suds are removed. It’s never been a problem for me.
Next, let the groats soak in your chosen solution for 10 minutes.
To do this, just transfer your rinsed groats to the glass bowl or jar you’ll be sanitizing them in.
Make sure they’re more than fully-submerged, giving plenty of water on top.
When the soak time is up, give your groats a really good rinsing.
Place them in a steel mesh strainer or colander (anything with small enough holes they don’t fall out).
If you normally rinse for one minute, this rinse should be for two or three.
This rinse before the soak helps in a couple ways:
- Reduce water viscosity, preventing water thickening from saponins.
- Make post-soak rinsing and sprouting easier.
Step 2. The Groat Soak
After rinsing, it’s time to soak the groats before rinsing them off again.
Transfer your cleaned groats into a sterilized glass bowl or jar.
Completely submerge them and let the water come up high enough to let them fully soak. 2x the amount at least.
Then cover the bowl by a cheesecloth and let them sit unbothered in your sprouting area.
Soak the buckwheat groats anywhere from 30 minutes to a couple hours.
The groats can be soaked for longer, but I’ve never taken them beyond a few hours.
I wouldn’t take them past 12 hours, but ready to stand corrected on that… will update after trying.
Once groats have gone from dormant to soaked, they’re now fully edible living sprouts (even without the shoot popping out yet).
Note: This soak for the buckwheat seed cleaning will also kick off the groat’s germination.
They won’t double in size or anything with a 30 minute soak, but longer soaks to see them puff up a bit with their tails.
Lastly, do a final post-soak rinse to remove starch buildup and ensure healthy buckwheat sprout growth.
Step 3. Set Daily Rinse And Flip Schedule
Ensure healthy buckwheat sprout growth by setting up a regular rinse and flip schedule.
After you rinse off your soaked groats, if you’re not just going to consume or bake them all right then and there, set up a doable sprouting schedule – your rinse and flip schedule.
Every 8 hours is the safest rinsing frequency for buckwheat. If you’re in a perfect sprouting environment, then you can be fine with twice per day (every 12 hours).
Rinse and Flip Schedule:
- Days sprouted: 2/3 maximum
- Rinsings: Every 8 hrs.
Always drain them very well during the “flip” portion of the daily rinse and flips.
Removing all excess water gives better air circulation and prevents mold growth.
Monitoring Buckwheat Sprout Growth
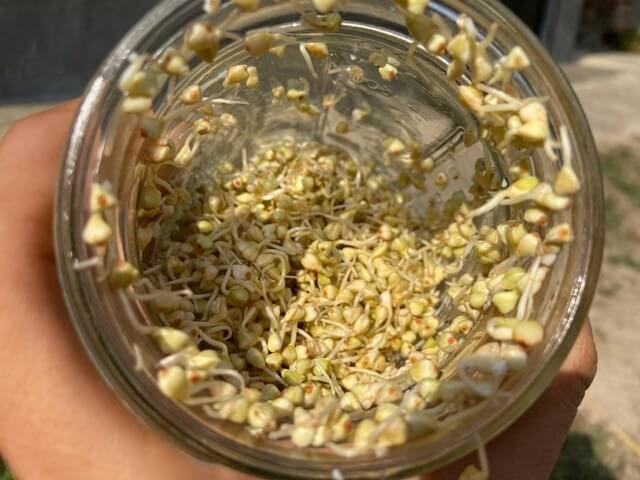
When monitoring the groats over the 2 days, you’ll notice it has little tails that start growing out.
Once you see these come out, they’re more than ready, so just harvest at your preferred date. Letting the tails get too long will make the groats start getting bitter.
Step 4. Harvesting and Storing
Harvesting
To harvest the buckwheat sprouts, rinse them through your mesh strainer until the water rinses through clearly.
Next, blot finishes dry on paper towels.
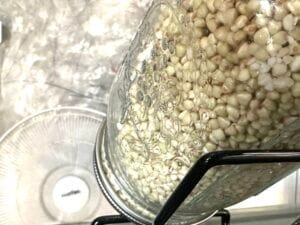
Lay them out on a towel lined tray or plate with dry towels, replacing wet ones in the beginning. A fan helps to dry them out.
Step 5. Storing Sprouted Buckwheat Groats
Short-term storage: If you’re not going to dehydrate them, then eat promptly and store them in a sealed container in the meantime in the fridge veggie drawer.
Long-term storage: When dehydrated, buckwheat sprouts can be stored as long as 2 years. You’ll need to use an air-tight container as well.
Bonus Step: Dehydrating Buckwheat Sprouts
Dehydrating lets you do things like grind down a fresh batch of dehydrated sprouted buckwheat before Sunday pancakes for examples.
There are numerous ways to dehydrate groats. Here’s the top options.
Using an oven
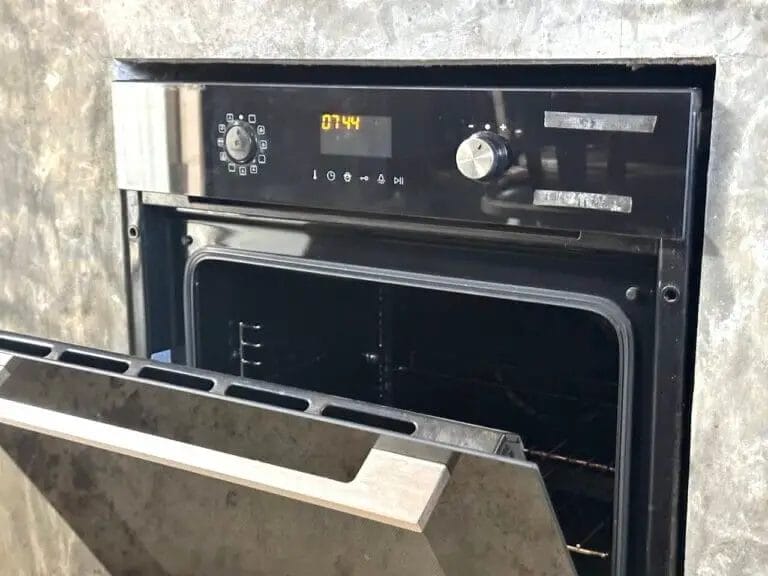
To dehydrate groats in an oven, use the lowest heat setting for around 8 hours. This can be as low as 105°F.
Then, leave the oven door open to let the temp come down a bit more.
Using a dehydrator
If you have a good dehydrator at 115 degrees F for around 5 hours. Make sure to place a mesh sheet on top so they don’t fly around from the blower that comes on (Dehydrator tips from Nouveauraw, but whole post is excellent).
Dehydrators can have some toxicity issues if they have plastic trays or components, but if you’re on the lookout for them I’ll share from my notes that the steel tray excalibur and cosori dehydrators with steel trays are highly regarded.
Buckwheat Sprouting Instructions: Step-By-Step To Dehydrated Sprouts
Equipment
- 1 mesh strainer Any colander or strainer that enables you to rinse groats
- 1 glass bowl For sanitizing
- 2 mason jars Quart size: 32 fluid ounces or 4 cups (can use just one also).
- 1 sprouting lid For jar sprouting
Ingredients
- 1 cup Buckwheat groats organic and sproutable (not heat-treated)
- 1 piece Cheesecloth any breathable, organic cotton cloth for covering groats while soaking.
Instructions
1. Sanitize Buckwheat Groats
- Rinse your cup of buckwheat groats to remove starch and anything else floating around that shouldn't be there.
- Use 1 part vinegar to 4 parts water do clean your groats. A drop of dish soap further helps, but this would require a thorough rinsing after the soak.
- In a sterile glass or stainless steel bowl, submerge the buckwheat groats in the vinegar seed cleaning solution. Cover the bowl with a cheesecloth and leave them for 10 minutes. A separate mason jar is OK for soaking, but a larger bowl lets them expand and is best.It's best not to use the same mason jar you'll be sprouting in.
- Rinse more than thoroughly after the cleaning-soak is finished. You want all vinegar remnants removed and the water running clear for a while.
2. The Groat Soak
- Do a sterile transfer here of the buckwheat groat seeds to a sterile glass bowl.
- Submerge them in water, leaving at least 2x the space on top. A short soak won't see them expand, but you should fully-submerge them with an ample amount of water on top.
- Leaving undisturbed in your sprouting area, soak the buckwheat sprouts for 30 minutes in a cheesecloth covered bowl.1 piece Cheesecloth
3. Set Rinse and Flip Schedule
- For groats, every 8 hours is ideal. If your temperature is great and not humid, then you're fine at every 12 hours.
- Make sure you've really let out all excess water in the jar after a very thorough rinsing. The water should run clear before you stop the rinse. And then you need to make sure drops don't fling off when it's time to tilt the jar over for the sprouting.
- If your room has no airflow or is humid or hot, a fan can help.
4. Harvest Time!
- When you've decided you want to harvest the buckwheat sprouts, towel dry them first. Then using new dry paper towels, lay them out thinly on a tray and air dry the finished buckwheat sprouts with some pats and a fan. Do this also to prepare them for long term storage.
5. Storing Dried & Dehydrated Buckwheat Sprouts
- For short term storage you'll towel dry them before placing them in a sealed container. These won't last long, so consume that week and sooner.
- For long-term storage, you'll need to dehydrate the groats after towel-drying them. I've added oven and dehydrator machine methods below.Note: When properly hydrated and stored, dehydrated buckwheat sprouts can store for up to a couple years.
Bonus Step. Sprout Dehydration Methods
- To dehydrate groats in the oven, first line your oven tray with a silicone baking paper (aka parchment paper that's not toxic).
- Next, bake them on the lowest setting you can, leaving the oven door ajar. 114°F for around 8 hours works great. Note: If you can reach double digit Farenheit numbers like a degree in the 90's, this would be good.
- For toastier options, crank up the heat. It will halve the time too.
- To dehydrate groats in a dehydrator, 115°F for around 5 hours can do it. If it's sunny, we use the sun. Otherwise the oven works great too.
Notes
Buckwheat Sprouting F.A.Q.
Below are some interesting and popular questions related to buckwheat sprouting.
Which buckwheat groats should I buy for jar sprouting?
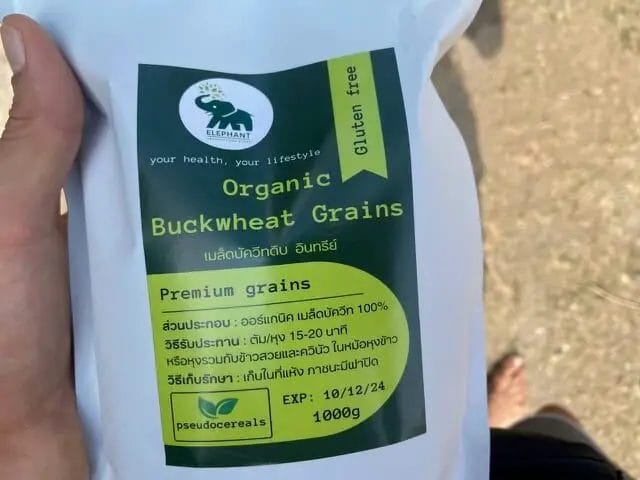
If the package says “sproutable” then those are it. Otherwise, you’ll need to make sure they have not been heat-treated. Often they’ll say hulled or groated.
Here’s ours that we are sprouting while in the tropics of Thailand:
In the U.S. it’s much easier to source certified organic, US-grown buckwheat groats like these below that are labeled as sproutable.
This ensures they haven’t been roasted or milled:
- 🌟 NUTRIENT RICH: Complete protein (all 9 essential amino acids),…
- 🌱 MOST VERSATILE RAW BUCKWHEAT: Sprout them (rich in macro +…
- 🏆 SUPERIOR STAPLE: Solid source of fiber + prebiotics (hello happy…
- 🌾 A GLUTEN-FREE SEED THAT TASTES LIKE A GRAIN! Make simple GF…
- 🇺🇸 Grown in the US and USDA certified organic, non-GMO, vegan,…
If your groats aren’t organic, they’ll need to go through a more thorough seed cleaning or better yet, seed sanitation, to remove pesticides and chemicals that could be found on buckwheat groats.
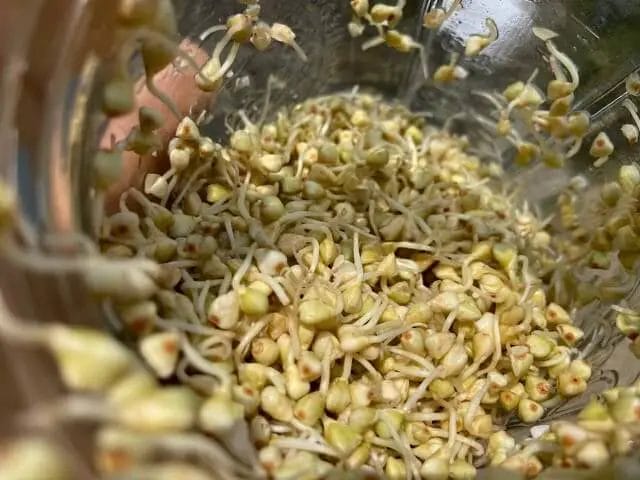
What do buckwheat sprouts look like?
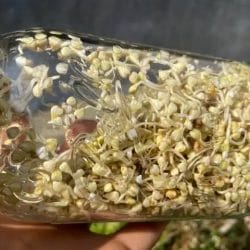
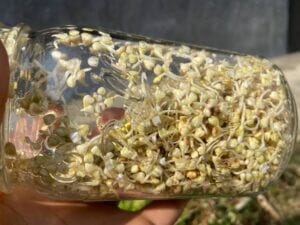
When first starting to sprout, the groats shoots will be white. These little white rootlets are called radicles. Once ready to harvest, they’ll be thicket, an inch or two long, and will be more green.
Here’s day 3:
Can you jar sprout buckwheat lettuce?
No. Buckwheat lettuce will not have been hulled yet.
It’s used to make buckwheat microgreens. Once hulled now left over are the sproutable groats.
Which is better, sprouted or unsprouted buckwheat flour?
Better For You
Sprouted buckwheat has an enhanced the nutritional value compared to unsprouted. Its increased nutrient contents and improved bioavailability translate over to its flour. But you don’t want to make a bunch of flour and let it sit stored. Better to grind it down whenever you’re needing, to keep its nutrient levels as high as possible.
The germination that happens during the buckwheat groat soak enhances the nutritional value in numerous ways:
- Increased bioavailability as a result of a reduction of antinutrients.
- Reduced enzyme inhibitors make for easy digestion.
- Increased nutrient content from sprouting, including phytochemicals, tannins, catechin-7-O-glucoside.
- Inorganic arsenic levels get reduced to almost zero when sprouted.
Better Tasting
Besides being better for you, sprouted buckwheat flour tastes much better in my opinion too. It’s similar, but all the subtle differences make a big difference in the end product.
And there’s a ton of good sprouted buckwheat flour recipes to enjoy once you get into the groove of sprouting and grinding it down for the flour.. not hard to do.
Can you sprout heat-treated groats?
The groats you find available by the pound or even pre-bagged at your major grocery store chains will most likely have been heat treated.
I’ve never tried to sprout these, but from what I hear they are still semi-sproutable (will come back to update once I learn about if milled or roasted groats could still be sprouted).
Which is the best seed cleaning method for buckwheat?
Vinegar is one of the best seed cleaning solutions for sprouting as it’s a true sanitizer vs salt or baking soda.
Baking soda doesn’t sanitize, but it is proven to be effective at removing pesticides.
If you happen to only be able to source non-organic buckwheat groats for sprouting, a bleach solution could be the most thorough and okay to use. Learn about using bleach for seed sanitation in our seed cleaning post.
Summary
Same-day sprouts are a secret weapon in the game of life. Learning how to sprout buckwheat groats lets you have on-hand one of the best gluten-free wheat flour alternatives. More than that, having sproutable raw groats on hand ensures you’re always less than an hour away from a powerfully-nutritious and kid friendly snack (just clean and soak for 30min).
Make gluten free Italian food that won’t punish you for eating it with Buckwheat groats!
Get fast, highly bioavailable nutrients that children love to snack on, tail or no. You can make it a thing (which tail length do you like best?). FYI they grow up to an 1 inch (2.5cm).
More nutrients, fast and easy sprouting, alternative to wheat flour for baking, pancakes, breads, more..
Buckwheat groats are one of the best types of sprouts out there. The pseudo-cereal will come to the rescue if you ever decide or are forced to stop eating gluten or wheat products.
Next: How To Grow Radish Sprouts – step-by-step jar sproutingccc instructions
Sources
- Dehydration tips mainly from Nouveauraw, but whole post is excellent.
- Sproutpeople.org has a great youtube vid on Buckwheat groats
Last update on 2025-07-15 / Affiliate links / Images from Amazon Product Advertising API

